An Open Source tool to grant controlled read access to unprivileged users on unix based OS. With LET-M-READ system admins can give read access to unprivileged users without changing the file permissions.
Simply, LET-M-READ makes it possible for an Unprivilaged User to read files (i.e logs) using various system commands like 'more','tail','tail with f','less','cat'.
Features
- User Authentication
- Event Log capture
- Easy UserAddition
- User Friendly
- Provides more options to un privilaged user for reading files
Prerequisites
- LET-M-READ should be started as root user to make it eligible to serve most of the user needs
- While Making Sudo Entry, If you would like to restrict the user to read only certain directories and its files. Just mention the path as a Startup Parameter (Example Given below)
- Perl 5.10 or above must be present in the server
- The commands being used by LET-M-READ less,more,tail,cat must be installled and have proper path precedence and defined in environment variable $PATH. As LET-M-READ will invoke the commands without path (not like /usr/local/bin/more its just 'more')
Supported Opearating System
Unix based OS with Perl 5.10 and above
For Instance, Let's say I have a user named "testuser" and I want to grant him an access to read files from the directory /opt/securedir using let-m-read. This is how it can be acheived.
How to Use?
- Download the Zip file & Uncompress it
- Add the User in LET-M-READ
- Update the Sudoers file
- Ask the user to test
Download
Download the Zip file from https://github.com/AKSarav/LET-M-READ and uncompress it in your desired location
AddUser
LET-M-READ comes with Additional Security. So its required to setup the userid.
Execute the adduser module as follows.
./adduser
Update Sudoers File
As per our requirement, we should grant read access for only /opt/securedir to 'testuser'.
Make sure the user "testuser" is present using 'id' command
id testuser
First, you’ll need to use the visudo utility…
sudo visudo
Add the below line ( Please update the correct path of letmread)
testuser ALL=(ALL) NOPASSWD: /path/to/letemreadv1/letmread /opt/securedir
Here:
/path/to/letemreadv1/letmread -> Fully qualified location where you have uncompressed the letmread.
/opt/securedir -> The Directory, for which you want to grant access to 'testuser'
Now you can communicate to the 'testuser', what is the command he has to execute and what is the let-m-read password he should use.
Invoking LET-M-READ (by testuser)
sudo /path/to/letemreadv1/letmread /opt/securedir
That's it. Now the user can enjoy reading the file with many commands like more,tail,less etc... and as the Infrastrcuture Owner you no need to worry about changing the file permissions (or) ownership.
The Complete TrailRun
mwi@mwi-virtual-machine /opt/sara/perlscripts/letmread/gitrepo $ ./letemread.pl /opt/sara/perlscripts/letmread/gitrepo/

__________________________________________________________________________

             LET-M-READ V1.0
__________________________________________________________________________
Enter UserName:sara
Enter Password:
Login Successful
Performing Access Validation on /opt/sara/perlscripts/letmread/gitrepo/

INFO: Let-M-Read have proper permission to read this File (or) Directory

==================================================================================================================================
S.No      LogFileName                                                                                              ModifiedDate
==================================================================================================================================
1         /opt/sara/perlscripts/letmread/gitrepo/letemread.pl                                                      Apr12 14:45
2         /opt/sara/perlscripts/letmread/gitrepo/adduser.pl                                                        Apr12 14:45
3         /opt/sara/perlscripts/letmread/gitrepo/.pwfile                                                           Apr12 15:31
4         /opt/sara/perlscripts/letmread/gitrepo/letmread.log                                                      Apr12 15:42
==================================================================================================================================
Enter the S.No of the file you want to read==> 2

You have selected Option:'2'

Performing Access Validation on the File /opt/sara/perlscripts/letmread/gitrepo/adduser.pl

Performing Access Validation on /opt/sara/perlscripts/letmread/gitrepo/adduser.pl

INFO: Let-M-Read have proper permission to read this File (or) Directory


___________________________________________________________________________________________________________

   How do you want to read the file you have selected [ /opt/sara/perlscripts/letmread/gitrepo/adduser.pl ] ?
   For Instance: If you want to use 'more' to read the file, Type 'm' -or- 'M'
___________________________________________________________________________________________________________

    [m/M] 'more'        [t/T] 'tail without -f'         [c/C] 'cat'
    [l/L] 'less'        [tm/TM] 'tail with more'        [tf/TF] 'tail with f'

___________________________________________________________________________________________________________

Enter your option:t


How many lines you want to tail2


Opening the file, Please Wait !!


-FILENAME: /opt/sara/perlscripts/letmread/gitrepo/adduser.pl
-COMMAND: tail
-DATE:Tue Apr 12 15:43:20 IST 2016


print "\nUserName $uid has been successfully added \n\n";
Event Logging
mwi@mwi-virtual-machine /opt/sara/perlscripts/letmread/gitrepo $ cat letmread.log
 [Apr 12 15:42:47:47]   'sara' Reading '/opt/sara/perlscripts/letmread/gitrepo/adduser.pl' with command 't'
 [Apr 12 15:43:18:18]   'sara' Reading '/opt/sara/perlscripts/letmread/gitrepo/adduser.pl' with command 't'
Content of ZipFile.
adduser - this module can be used for adding new username into LET-M-READ
letmread - this is the core logic module and heart of letmread
license.txt - GPL V3 License Document
more_instructions.txt - A supplementary text file being used by let-m-read.
README.md - GIT repository Read me file.
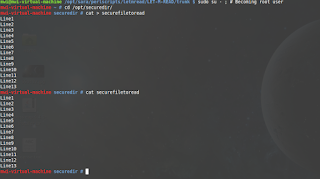
Some screenshots:
Hope it helps.
I would be happy to see your feedback through comments. Help LET-M-READ to improve by providing any suggestion/feedback.
If you find any bug/ want to suggest any moderation please use github (or) comment here.
Cheers,
AK Sarav
sara@mwinventory.in
Join with us at https://www.facebook.com/middlewareinventory


